I’m back with another (better!) way to add pockets to the Freestyle Harem Pants without having to add a side seam. Vertical welt pockets shaped like inseam pockets! This is one of those projects that rolled around in my brain several times and then came out perfectly … love when that happens!
Typically, welt pocket “bags” (the part your hand goes in) are rectangular shaped. I wanted to create one that was shaped like an inseam pocket, so my hand would fit comfortably and things that I put in wouldn’t fall out easily since they’d be lower than the opening.
I modified the Capsule Skirt pocket piece because I love how it’s shaped. The way it attaches to the waistband is brilliant! It keeps the pocket aimed toward the front and also prevents it from becoming saggy when used.
For the purposes of this tutorial, I will show you how to modify the FREE multi-size inseam pocket available to download from this blog post (I used the adult size). If you own the Girl’s or Women’s Capsule Skirt pattern, feel free to start with the pocket shape from it instead.
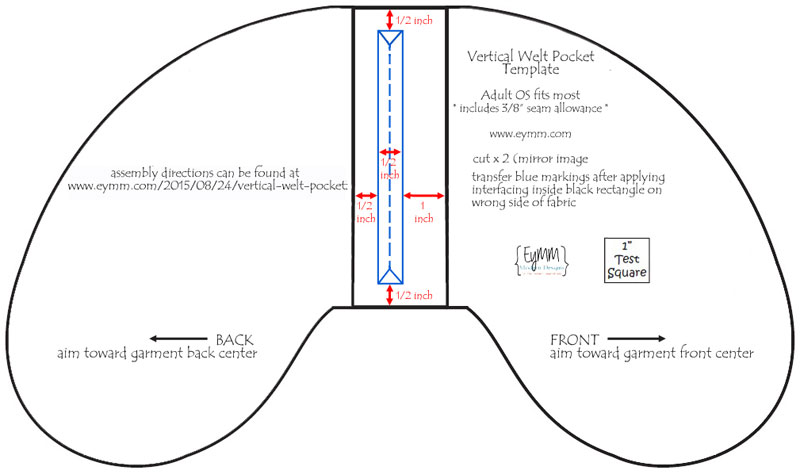
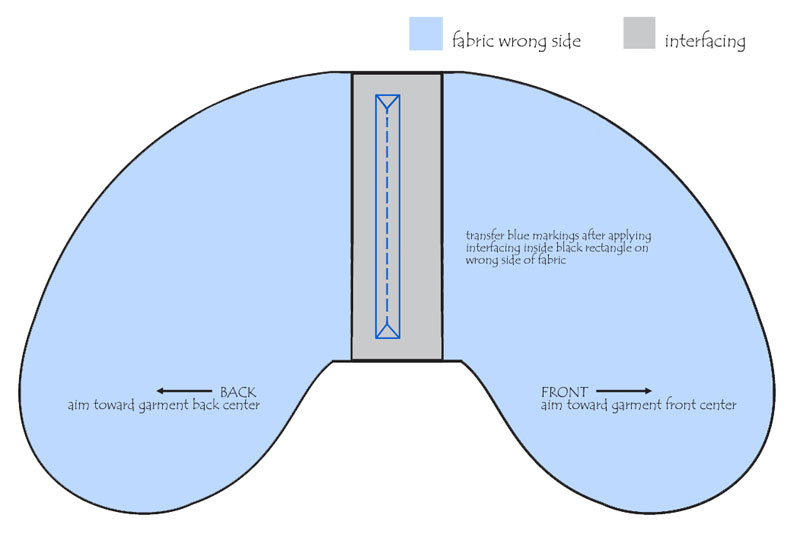
To create the Vertical Welt Pocket Template, the first thing I did was trace around my inseam pocket. Next, I added a two inch wide rectangle beside the “inseam” edge and the traced a mirror image of the pocket butted up against the other side of that rectangle. This gave me the basic shape needed for a vertical welt “inseam” pocket.
The last step is to draw in the blue rectangle. It should be 1 inch shorter in height than the original “inseam” edge and centered top to bottom. It should also be 1/2 inch wide and placed so one long side is centered in the black rectangle. Draw a dashed line up the center of the blue rectangle with “Y” shapes at each end, going to the corners.
That’s all it takes to drafting the shape of the pocket!
** I left the 1 inch test square on when I created my tech drawing from the free adult size inseam pocket. If you wanted to use that picture rather than drafting your own adult size pocket, resize it so that the 1 inch square measures correctly when printed. Be aware that it won’t fit on one printer page … so it may be easier to just draft your own. 😉
Now, on to assembly directions:
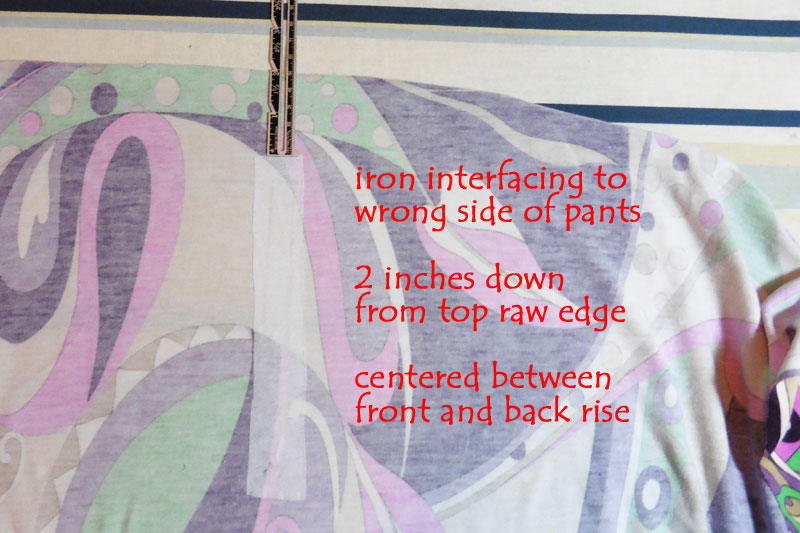
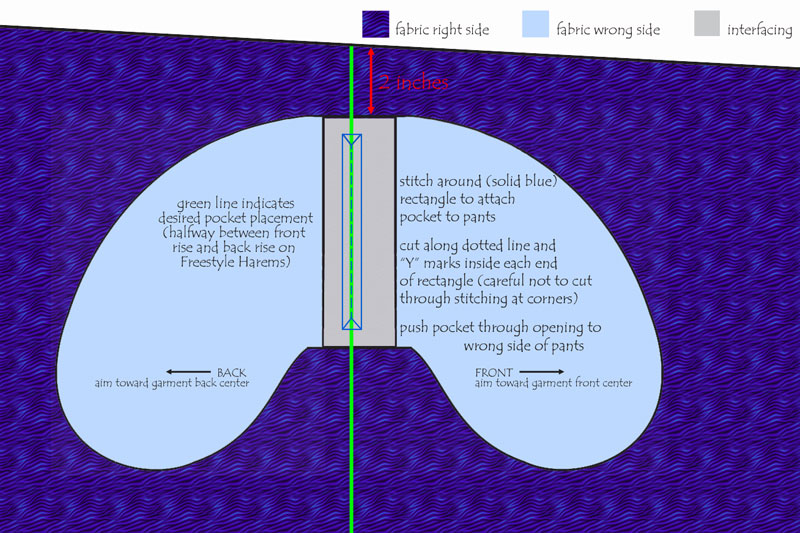
The first steps are to iron light weight interfacing to the wrong side of both the pants leg (see photo above) and to the pocket pieces (see tech drawing below). The interfacing for the pants should be 1 inch wide and the same height as the black rectangle on your pocket piece. For the Freestyle Harems (in either Girl’s or Women’s sizing), place it on the pant leg piece 2 inches below the top raw edge and centered between the front rise and back rise. The interfacing on the pocket should be 2 inches wide by the height of the original “inseam” edge. Iron it onto the rectangular space you added between the two pocket shapes as shown in gray in the drawing below.
When you cut the pocket pieces from your fabric, you will need one for each completed pocket that you want to make. The pattern is symmetrical, so you can cut two just alike. The difference comes when you transfer the blue rectangle markings to the fabric. You will need to draw the rectangle onto the interfacing as shown in my template above for one pocket. For the second pocket (assuming you’re putting on on each leg/hip), you will need to move the blue rectangle to the other side of the pocket’s center (so there is 1 inch on the left and 1/2 inch on the right).
Place the pocket right sides together on the pant leg so that the center of the blue rectangle is centered on the leg and the pocket’s top is 2 inches below the top raw edge of the pant leg. Be sure that the half of the pocket without the blue rectangle is aimed toward the front center/rise of the pants like indicated in the tech drawing above. An easy way to “mark” the pants center line (represented by the green line above) is to fold it along the center and iron to form a crease on which you can align the pocket. The interfacing on the wrong side of the pants piece should also be centered on that crease.
Sew around the outside of the blue rectangle to attach the pocket to the pants. Next, you will need to cut along the dashed line in the middle of the blue rectangle. Cut the “Y” marks also, being careful to snip up to but not through your stitching at each corner. If you do on accident cut your stitches, you will need to resew them before continuing.
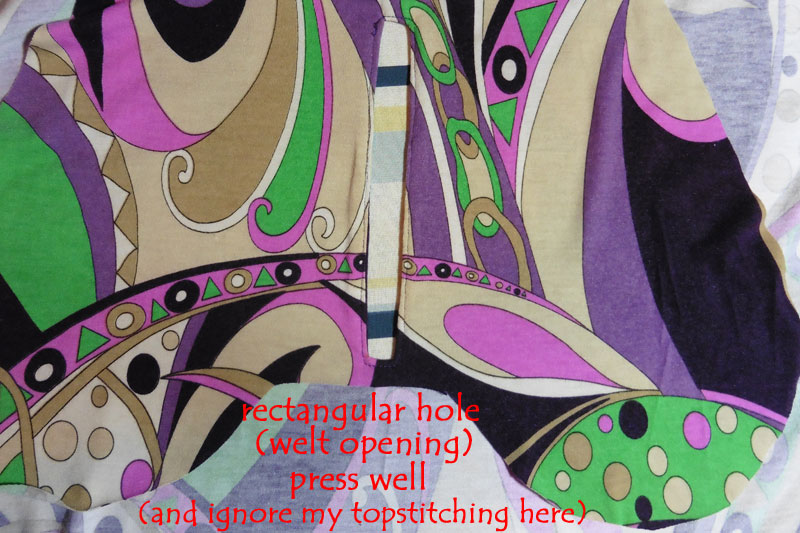
Pull the pocket fabric through the hole to the wrong side of the pant leg. Smooth out the rectangular hole of your welt opening and press well. If there are puckers at the corners, try turning it back and snipping the “Y” marks closer to your sewn rectangle corners. (Note: I topstitched at this point, but found later that I needed to topstitch again, so disregard that in the above photo and do not topstitch yet.)
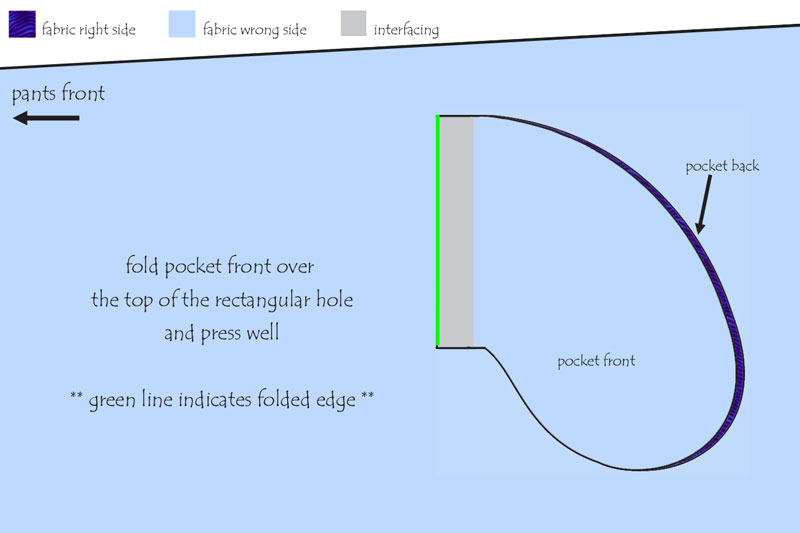
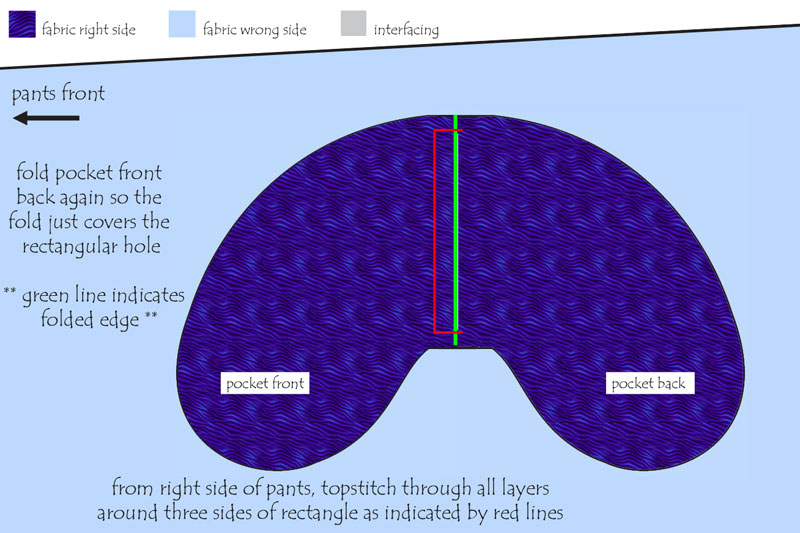
Fold the front of the pocket over the top of the hole/welt (along the green line above) and press well. The pocket front piece will not quite line up with the back piece during this step.
Fold the pocket front half back again so that the new fold (green line above) is along the back edge of the welt opening. From the right side of the pant leg, topstitch through all layers (pants and folded layers of pocket) around the top, front, and bottom sides of the welt opening as indicated by the red lines in the above tech drawing.
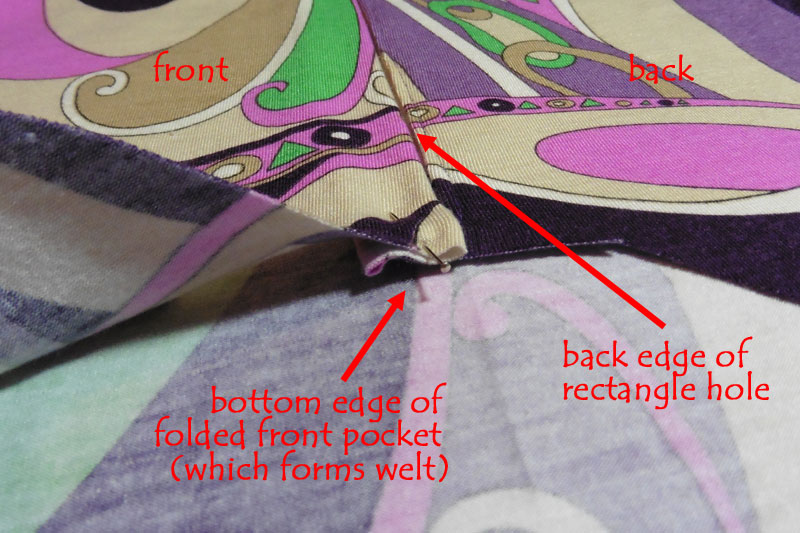
When the front pocket has been folded twice, the view of the bottom raw edge of the pocket should look like the above photo. That second fold forms the welt that covers the finished pocket opening. The photo was taken before topstitching the three sides of the welt opening.
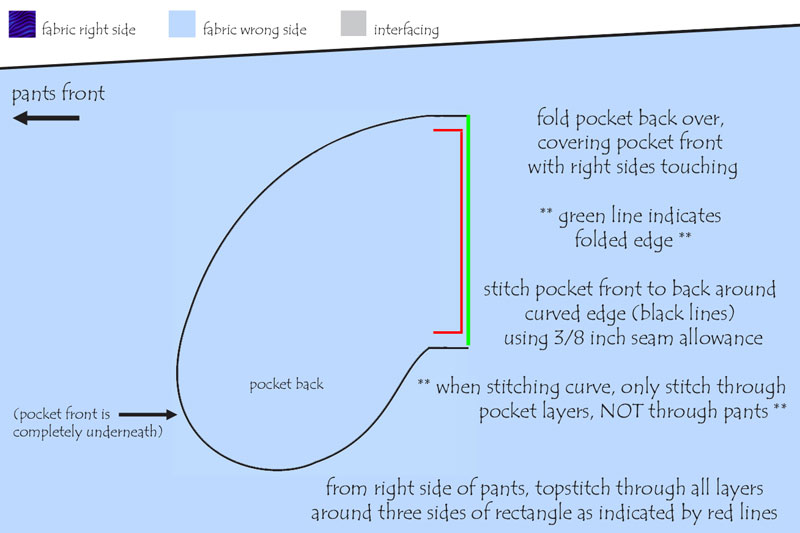
The last step is to fold (indicated by green line above) the back pocket half over to completely cover the front half, with right sides touching. Press the fold well. Lift the two layers of pocket away from the pants and sew them together around the curved side, using 3/8 inch seam allowance (along black line in above tech drawing). Be sure to only sew the pocket layers to each other … do not sew the pant layer!
Smooth the pocket back into place. From the right side of the pant leg fabric, topstitch through all layers around the top, back, and bottom edges of the welt opening. Aside from finishing the rectangle’s topstitching, this serves to hold the back of the pocket in place.
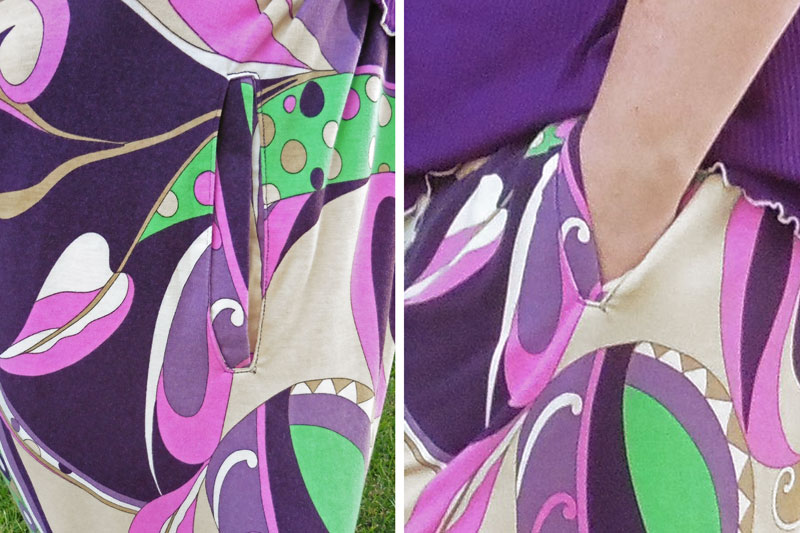
That’s all there is to assembling a vertical welt pocket. Finish constructing the Freestyle Harems pants as per the pattern and enjoy your new pockets with no side seam in sight!
** If using the Capsule Skirt pocket shape, you will also need to baste the top of the pocket to the top raw edge of the pant leg before sewing on the waistband.
I highly recommend the Capsule pocket because it helps keep the pocket from sagging and holds the pocket aimed toward the pants front (no sitting down on your keys/phone/etc. because it fell behind your thigh!), plus it is less bulky when sewn into the waistband than other similarly shaped pockets.
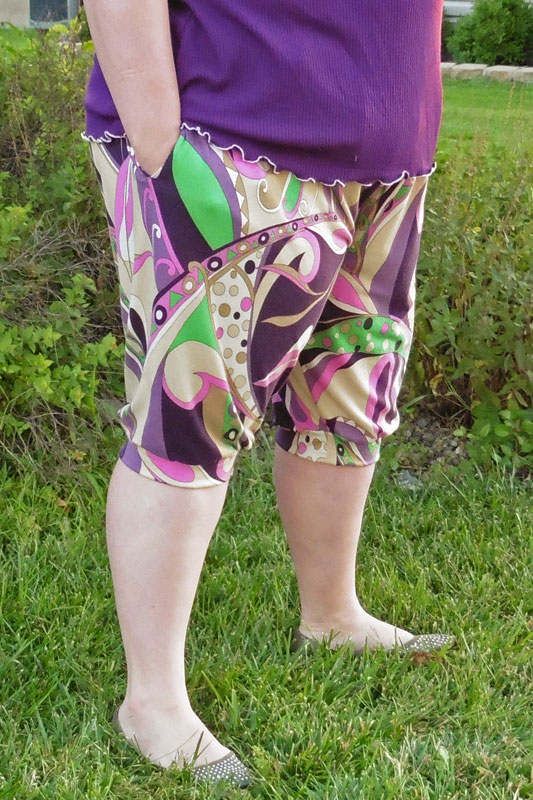
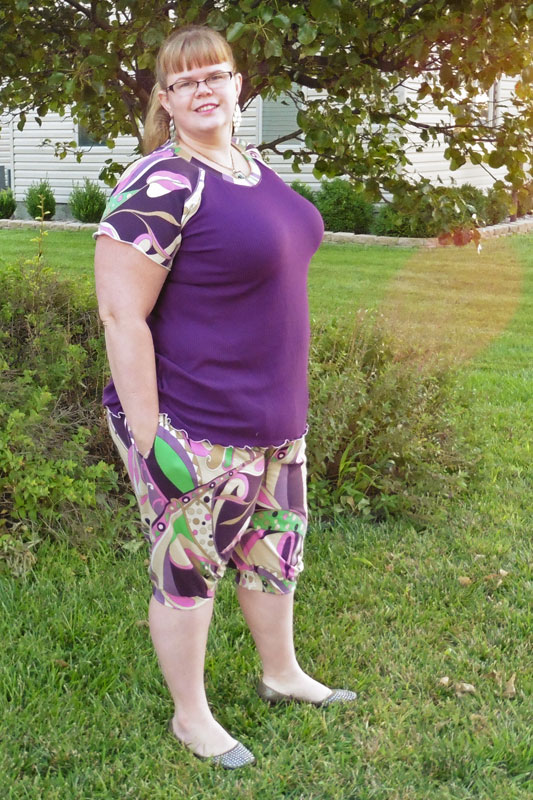
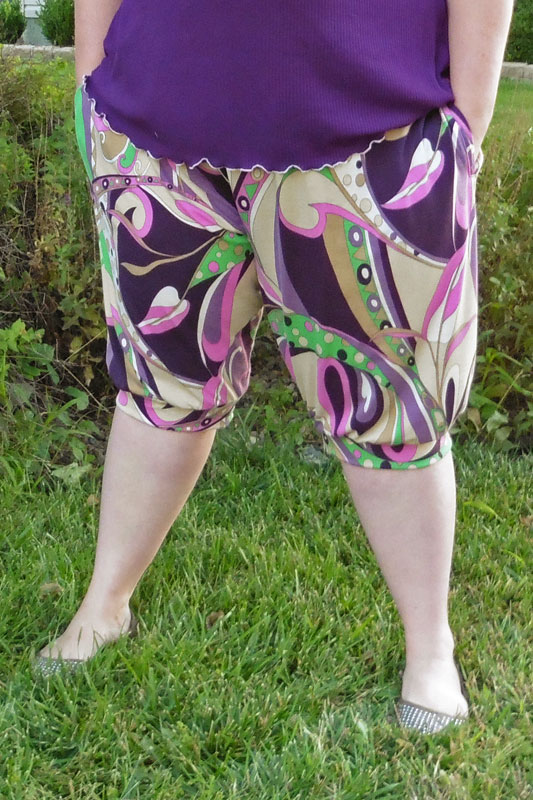
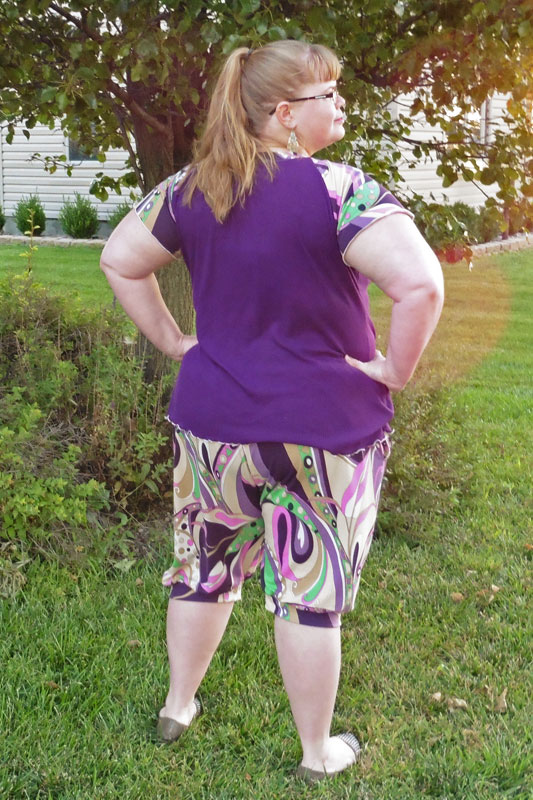
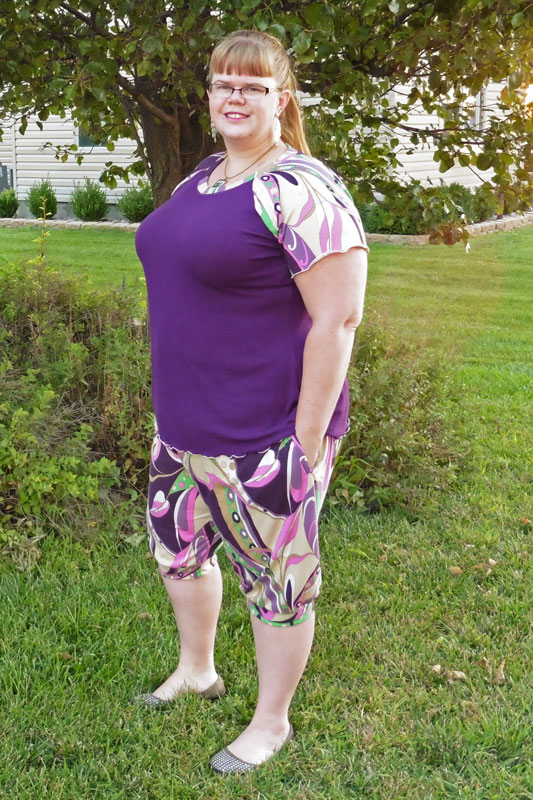
I’d originally had this fabric set aside for a dress, but am glad I made capris instead. I love that I got pockets added to them without having to cut and put a seam down the middle of the fabric’s print on each leg! The vertical welt pockets look so much nicer than my last attempt at adding pockets with no side seam.
I love my new Freestyle Harem’s so much! I used the leftovers to make a matching raglan top, following the same hacks as my striped raglan. Hooray for a super comfortable outfit that still looks completely put together!
Happy Sewing!! ~ Joelle


5 Responses
sheilaokelly
Thanks so much. I am copying a pair of RTW trousers for my niece that has these pockets and I had no idea how to do it. This is brilliant.
Joelle
Glad to hear it helped!
sheilaokelly
I had one problem – I couldn’t attach pockets to raw edge of waist because as per instructions I had placed them 2 inches down from the waist. I ended up stitching two vertical pieces of tape from pocket top to waist band. Where did I go wrong?
Thanks very much.
Sheila
Joelle
The step of basting it to the top raw edge and into the waistband is only if you used the shape of the Capsule Skirt pocket, which has a swoop up in order to reach the waistband seam.
sheilaokelly
Ah!
Okay, next time I will extend my pocket pieces up to the top, or add a single piece of fabric on one of the pocket pieces to reach the waist band.
Thank you for replying.