Earlier this year I got a chance to help out Hayley of Mouse House Creations with her Ladies Caroline Dress. Hayley herself is petite with average proportions. So when her testers with larger busts were having fit issues I knew what the problem was and offered to make up a tutorial for a full bust adjustment. Today I am going to share the same FBA tutorial with you! Proper sizing/fit is key to a stunning finished garment, as someone with a cup size WAY past DD (try 34H/I) I can attest to what a huge difference a proper FBA can make.
Princess Seam Full Bust Adjustment
(FBA) Tutorial
Start by measuring over your bust down under your arms and back up and over your bust on the other side. Then measure across the fullest part of your bust like normal. If your over bust measurement is 2″+ smaller than your bust measurement, pick your bodice size based on your over bust for the bust/chest measurement and then do an FBA. The reason for this is simply adjusting a larger size down will alter the lines, shape and fit.
Pieces as is.
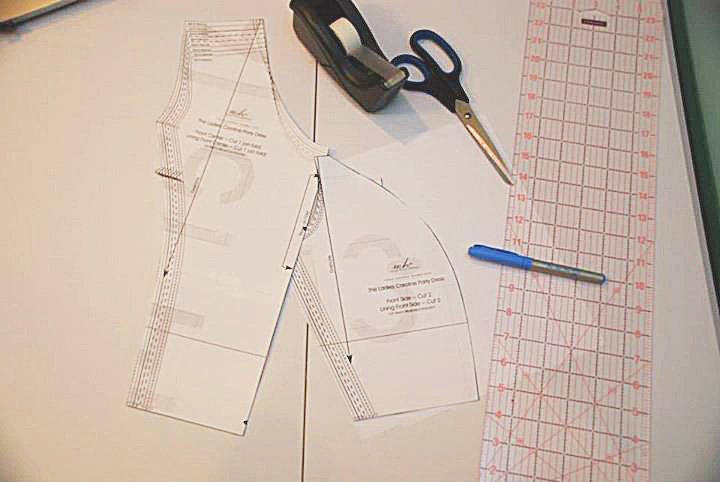
Mark bust point on both pieces. With seam allowance a size 12/14 is about 11″ down from the highest shoulder point and you want the mark 1/2″ from the edge of the side.
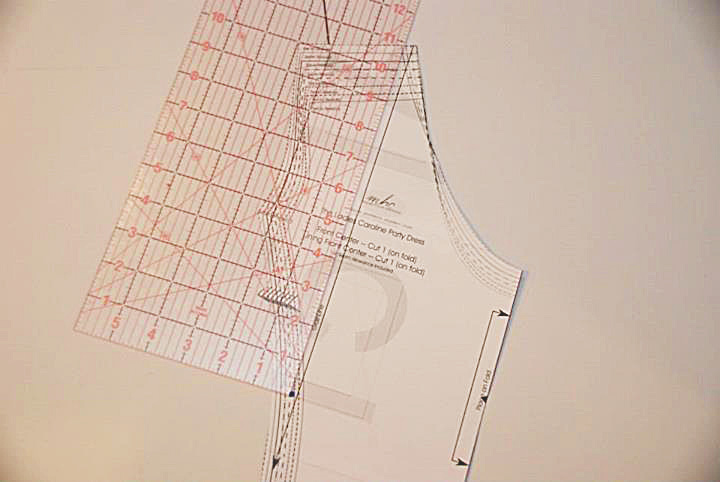
Match up your pieces like sewn, but transfer your bust point mark over, placing it also 1/2″ from the edge.
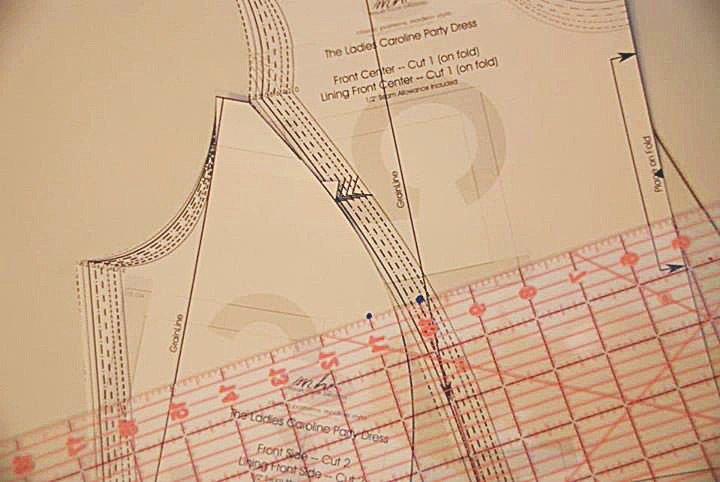
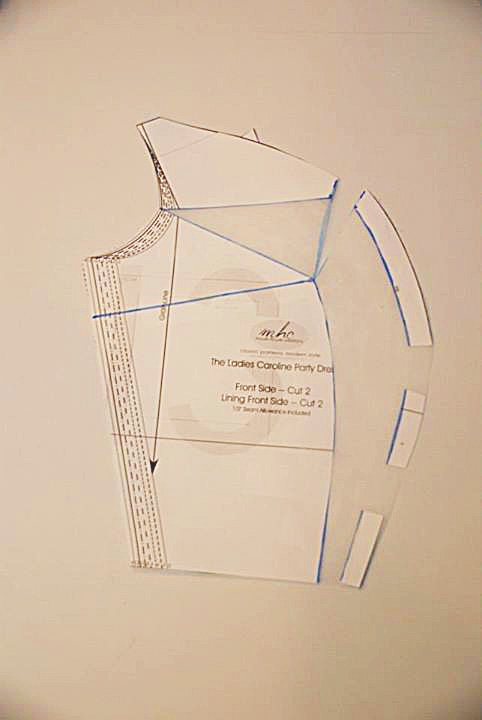
Now, draw a line down 1/2″ along the edge of your princess from the seam. Then, draw a straight line from bust point to the middle of the arm opening and another from bust to the side seam about 2″ down from the point where the side seam & arm holes meet.
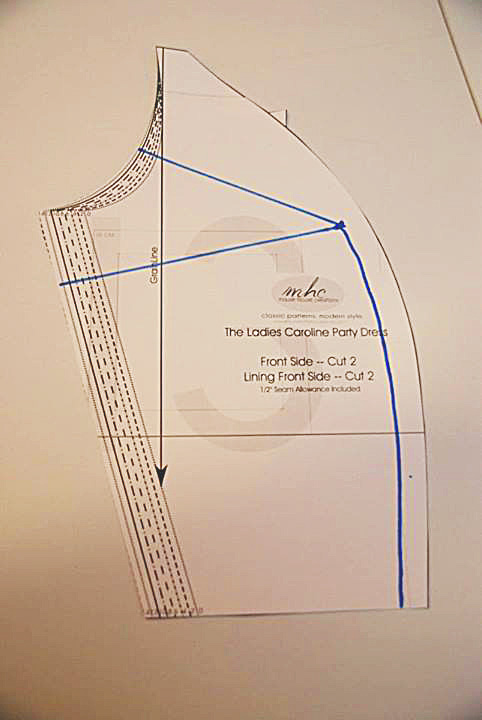
Next, make 2 cuts with the first starting at the side seam and stopping about 1/16″ from the bust point. Then, starting from the bottom edge go up through the bust point, stopping 1/16″ from busting through the arm seam. You should now have 1 pivot point at the arm, and one at the bust.
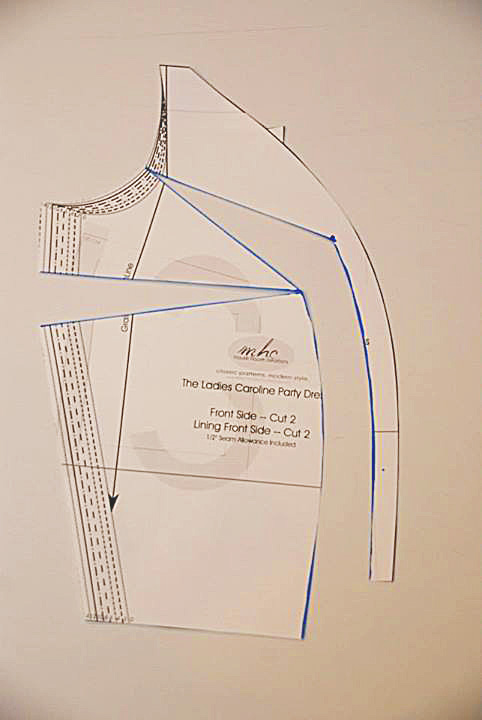
Now, you want to take your full bust – the full bust measurement of the size you picked and that is how much room we need to add. Mine is 4″. Since there are 2 side panels that means I need to add 2″ per side. **NOTE** Some tops have more ease in them and you may not need to add the full 2″. This one does not, so I need to add the full amount**
At the bust point, use a ruler to add the amount needed and tape from the bust point pivot to the small 1/2″ strip keeping that the full width needed.
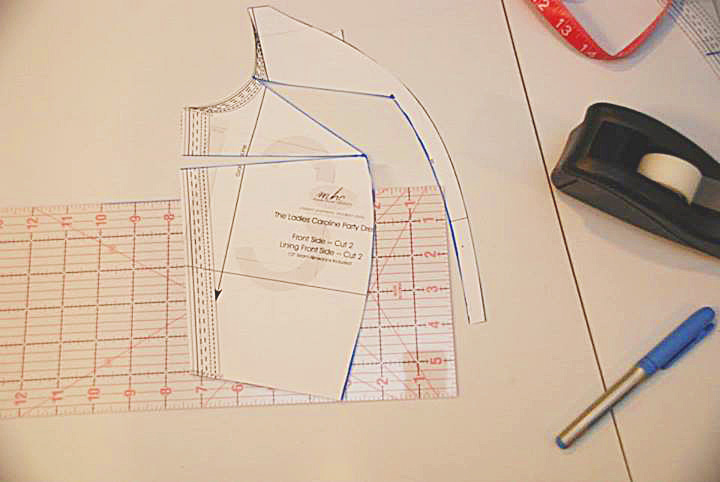
Next, you will want to cut your long skinny section into a few pieces and spread them out as shown here. I did NOT need 4″ added to the waist so I tapered it in. This added only 1″ total to the waist instead. Make sure to keep the fullness closer to the bust point.
Tape in place, filling the entire vertical gap from the arm to the waist seam. You can fill with scrap paper or clear packing tape.
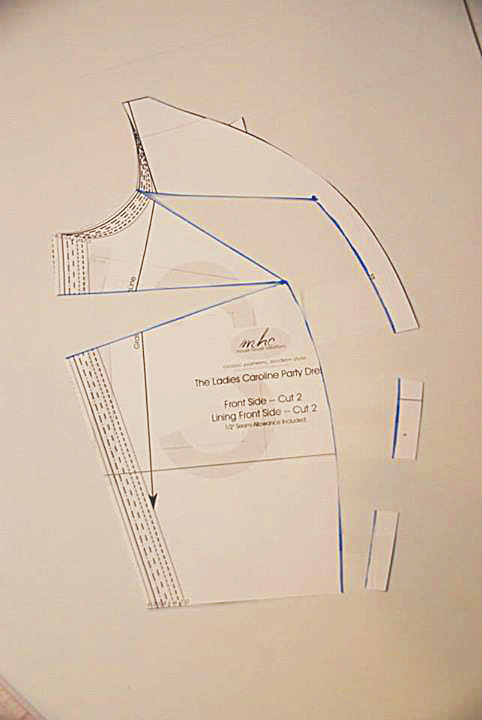
Draw a line connecting the 2 halves of the original bust point mark and continue to the edge of the paper.
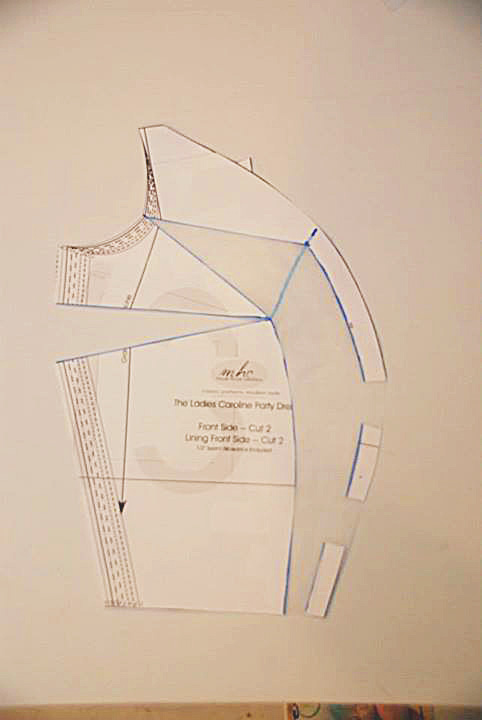
Cut along that mark and close and tape the original line to the side seam. Fill your new gap with tape/paper.
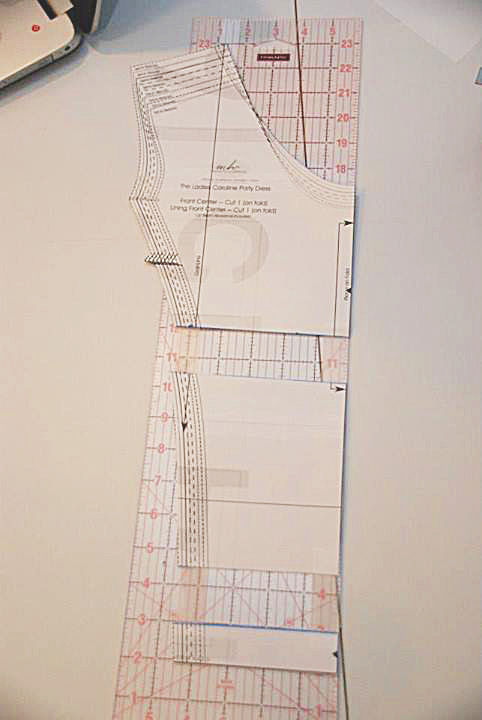
With a soft flexible measuring tape, measure from the top point of the princess seam on your new piece to the waist. Repeat with the original front center piece. For mine, there was a 3″ difference.
Then, cut across your center piece at the bust point and again about 1.5″ from the bottom. Since I need to add 3″ I then add 1.5″ to each gap lengthening the center panel 3″ to accommodate for the bust.
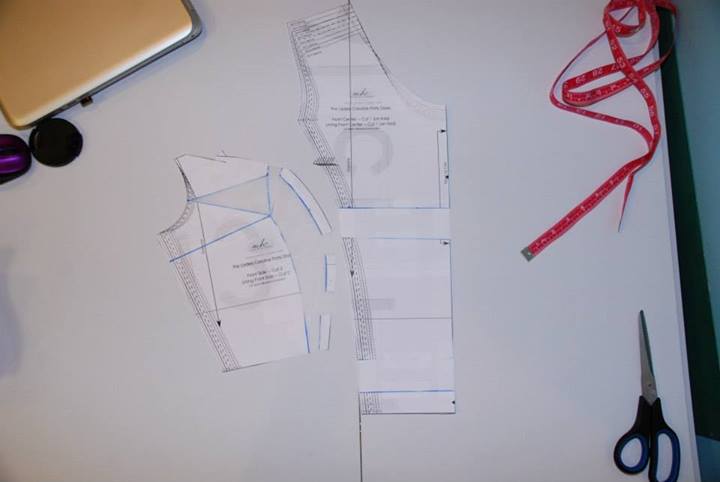
Your new pieces are finished. Cut and sew as normal.
More FBA tutorials:
Bodices with Princess Seams:
Sew Mama Sew FBA for Princess Seams
By Hand London FBA for Princess Seams
Bodices with Darts:
Coletterie FBA & SBA with Darts
Christine Haynes FBA with Darts
Sew News FBA with Darts
Megan Nielsen FBA with Darts


2 Responses
Erin Biggers
Your instructions are awesome and so easy to follow. 🙂
Denita
Reblogged this on HattieLu and commented:
I really needed to read this today! For those of us with larger busts getting the proper fit can definitely be challenging!